


Baking Disasters and Funfetti Cake Success
The first cake I ever baked was a disaster. I think I was probably about ten years old and I had decided my mom needed a birthday party. So I drew some invitations, used my saved up money and bought soda and snacks, and went to a neighbor’s house to make a boxed cake. Unlike this delicious funfetti cake – an original recipe by yours truly – I chose a plain vanilla cake. I also made a boxed vanilla frosting. It was the early 70s, after all, no premixed frosting.
But Will it Work Out?
I pretended to be visiting my friend, then got to work. I read the directions (I was an excellent reader!), mixed everything, and left while it baked. My neighbors assured me they would watch over the cake and frost it.
The Funfetti Cake will not be Stopped by Bad Experiences
Come party day, the beautiful vanilla frosted cake made an appearance. I was so proud! My first cake! Except it wasn’t. My cake was a flat bubbly pancake. They made me believe it was my cake and then smiled at me knowingly. But I didn’t know! And when I did find out, I was incredibly embarrassed. That was probably 50 years ago and, as you can see, I am totally over it. Ha ha.
Keep It Moving – Toward Funfetti Cake
So let’s fast forward to today when I cannot be defeated by a boxed cake mix – but would never make one. Instead, I can make my own cakes from my own recipes. I’m glad I didn’t let my embarrassment keep me from continuing to bake. And now I can share these recipes – and this funfetti cake – with you!
A Festive Cake
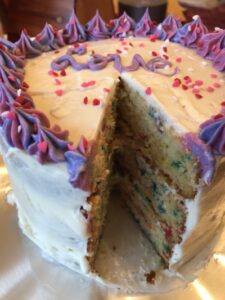
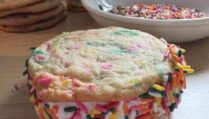
This funfetti cake is extremely moist and colorfully festive. Tip: I have been adding a bit of cornstarch to most things I bake these days. It really makes the cake extra fluffy. The rest of the ingredients are typical of a cake: butters, sugar, eggs, vanilla, etc.
A Tiny Festive Funfetti Cake
One of the best things about this cake is that it is only 6 inches! It is big enough for a small family gathering or to give as a gift. It can also be decorated in a variety of different ways. This was my “Pride Cake,” (rainbow sprinkles!), so I did a two-tone buttercream frosting border. You can use a bit of the buttercream to write a message on top. I finished off with heart-shaped sprinkles, but more rainbow sprinkles would work as well.
Party On, Friends!
Best of all, go gather your sprinkles and throw yourself a little party! Funfetti cake for the win.

Funfetti Cake
Ingredients
Funfetti Cake
- 1 3/4 cup all purpose flour
- 3/4 tsp baking powder
- 1/2 tsp baking soda
- 1 tsp cornstarch
- 3/4 cup butter softened
- 1 cup granulated sugar
- 2 eggs
- 2 tsp vanilla
- 3/4 cup milk
- 1/2 cup sprinkles
Vanilla Buttercream Frosting
- 1 cup butter softened
- 4 cups confectioners sugar
- 2 tsp vanilla
- pinch of salt about 1/8 tsp if necessary
- food coloring gels
Sprinkle Decoration
- Variety of sprinkles
Instructions
- Preheat the oven to 350 degrees.
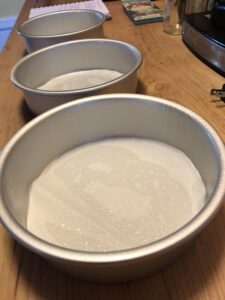
- Prepare 3, 6-inch pans. Spray lightly with cooking spray. Line with parchment paper circles. Lightly spray the parchment paper. I do this for most cakes and no longer have to dig them out with a knife or spatula, tearing the bottom.
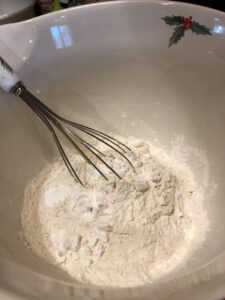
- Add the dry ingredients to a medium bowl: flour, baking powder, baking soda, cornstarch. Gently whisk together (you can also use a fork).
- Add the softened butter and sugar to a mixing bowl. Cream them together with a paddle attachment on low speed for about two minutes.

- Remember to always scrape the sides and bottom of the bowl with a spatula so nothing goes unmixed.
- Add the eggs, one at a time, mixing between eggs.
- Add the vanilla and mix until just incorporated.
- Alternate adding the dry ingredients and the milk to the batter. I usually do this in thirds.
- Mix only until completely combined, then remove the bowl from the mixer.
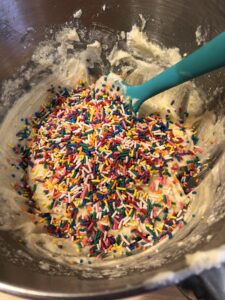
- Add in the sprinkles and mix by hand.
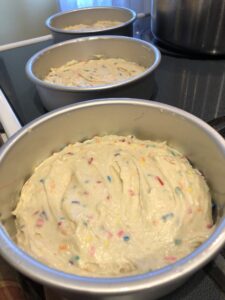
- Pour the batter evenly into the prepared pans. I got it basically even by using a ladle and putting one scoop in each pan and repeating until complete.
- Smooth the surface of the batter with a spatula.
- Bake the cakes for about 20 minutes until the top is golden and the sides pull away from the pan. Stick a toothpick in the center. It should come out clean if it is done. NOTE: Two of my cakes were baked in 20 minutes and the third was still completely uncooked in the middle. Test each cake for doneness.
- Let the cakes cool in the pans for about ten minutes, then turn them out onto wire racks.
- While your cakes are baking, you can prepare the buttercream, but you cannot start frosting until they are completely cool.
- For the frosting, add the butter and two cups of confectioners sugar to a mixing bowl. Beat on low speed until completely combined. Be sure to scrape the bowl.
- Add one more cup of the sugar, mix, and then add little bits of the final cup of sugar. You can taste to see if you like it and then determine how much more to use. I did use four cups. For a stiffer frosting, you may use a little more.
- Add the heavy cream and vanilla and beat.
- If you think the frosting is too sweet (I did!), add just a pinch of salt – about 1/8 teaspoon.
- When the cakes are cooled, slice a thin layer off of the top of each so that they are totally flat. Using a serrated knife reduces crumbs.
- You can prepare your work surface (I used a cake turner) by dropping on a bit of buttercream as a little glue, putting down a square of parchment paper and putting on another drop of buttercream on that. Place the first layer on that buttercream to keep it from moving.
- Add a layer of buttercream on top of layer #1, stack the second cake, and repeat.
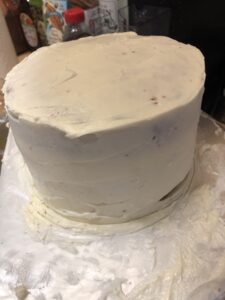
- After this, you can do a crumb coat: a thin layer of frosting to seal in the crumbs.
- Following the crumb coat, it is a good idea to put your cake in the freezer for about 15 minutes.
- Once the cake is chilled, spread the frosting evenly all around, smoothing with a cake smoother tool. Then top the cake with buttercream and even it out with a metal spatula. Honestly, it all took a rather long time to get it smooth. Be patient! It takes practice.
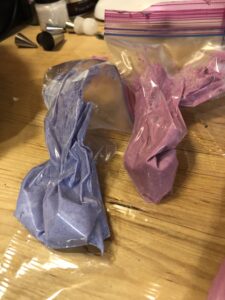
- If you want to add a rainbow border, split the remaining buttercream into two bowls.
- Add different food coloring gels into each bowl and combine. I use a plastic spoon that I reuse for other cakes, one spoon per color, to mix. The gels are very strong, so start small and mix and add until you are happy.
- Add each color frosting to a different small Ziploc.
- Lay a sheet of plastic wrap out on your work surface.
- Cut a corner off of each bag and squeeze them, in alternating straight lines, onto the plastic wrap.
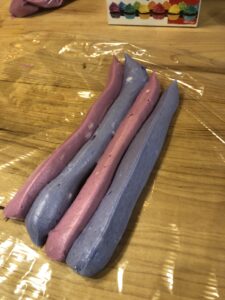
- Gently roll the frosting into the wrap and twist the bottoms closed (like a Tootsie Roll). DO NOT SQUEEZE THE FROSTING TOGETHER OR YOU WILL CREATE A NEW AND PROBABLY UNPLEASANT COLOR.
- Prepare a piping bag with a tip.
- Snip off one end of the plastic wrap and slide it into the piping bag.
- As you squeeze onto the cake, you should have two different colors.
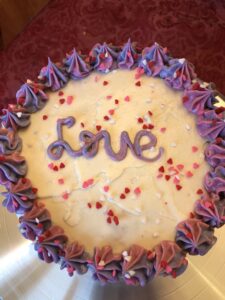
- Finish off your cake by scattering the sprinkles of your choice on the top.
- Have a party for yourself because YOU DID GREAT!