


As a very experienced cook and baker, I can generally make anything I set my mind to. My bread making skills have been a little less than stellar, though. My problem comes down to one thing: a nice crust and a super dense loaf. Where are the holes!? Why is this like a brick?
Enter this crusty country French bread.
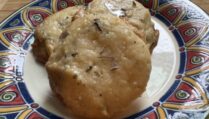
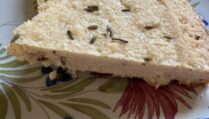
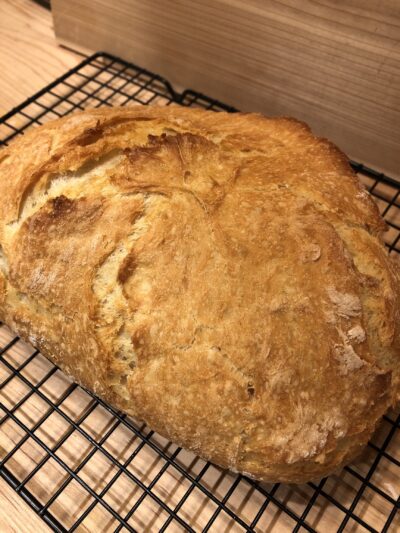
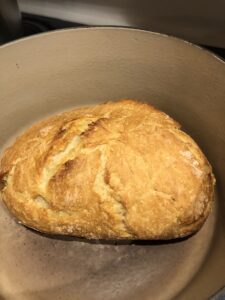
After many failed experiments, I think I finally have it right. My husband, a true Frenchman and, therefore, a connoisseur of bread has declared this bread delicious. The outside is very crunchy, the inside light with a scattering of air holes.
Best of all, this bread requires very little in the way of ingredients or labor. The one thing it does require, however, is a Dutch oven. I have generally tried to avoid posting recipes that require any kind of fancy equipment, but in this case, the pot is what makes the crust perfect. I have one of those fancy Le Creuset pots that I got at an outlet store because, honestly, I would never spend that kind of money on a dish. You can use any other kind of Dutch oven, of course, just as long as it can be safely put in the oven – including the knob. I think mine is good to 500 degrees, which is perfect because this gets cooked at 450.
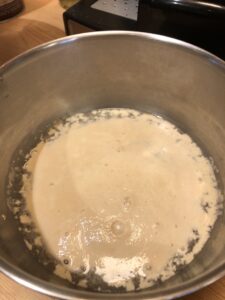
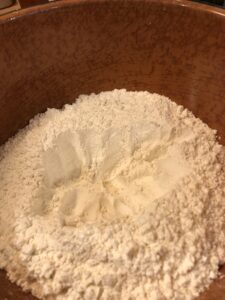
The dough itself has very few ingredients: water, yeast, sugar, flour, and salt, with a drizzle of olive oil for the bowl. Activate the yeast first by adding it to warm water with a teaspoon of sugar. Let it sit for five minutes. In the meantime, measure out the flour and mix in a ½ teaspoon of salt. Form a well in the middle and, when the yeast is foamy (about 5 minutes), pour the liquid in. I don’t knead this dough, nor do I use the mixer. I simply combine everything with my hands.
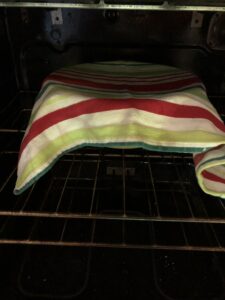
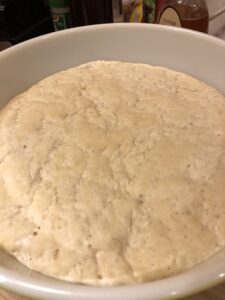
A nice slow rise (90 minutes at least) in a warm place adds lots of air to the dough. In my super cold house, I have to turn the oven on and let it reach 170 degrees before turning it off. That serves as my warm place. If you turn on your heat like a normal human being, you might be fine without that.
Here is the special part: once the dough has risen, I place the Dutch oven (with its lid on) into the oven and turn it on to 450 degrees. When it reaches temperature, I let it sit in there for about 20 minutes. You know what that means? That pot is HOT!!! Do not touch it. Do not let your hand accidentally come into contact with the side. Do not rearrange your dough in the hot pot. In other words, don’t do any of the things I have done. Instead, ALWAYS handle that pot with very good oven mitts and BE CAREFUL.
After thirty-five minutes of baking you will have a beautiful, golden loaf of country French bread that is crunchy on the outside and light and airy on the inside. We love it hot out of the oven with a nice coating of butter and jam.
See the recipe for the exact steps and measurements!
Crusty Country French Bread
Ingredients
- 1 1/2 cups warm water
- 1 tsp sugar
- 1 pkg active yeast 1 pkg = 2 1/4 teaspoons
- 3 cups all purpose flour
- 1/2 tsp salt
- 1 tbsp olive oil
Instructions
- Make sure you read the tips at the bottom of the recipe for helpful hints.
- In a bowl, combine warm water (about 105 degrees), sugar, and yeast. Mix lightly and cover the bowl with a plate. Let sit until foamy, 5-7 minutes.
- In a large bowl combine the flour and salt. Mix lightly with a fork or whisk.
- Form a little well in the middle of the flour/salt mixture.
- When the yeast is foamy, pour it into the well in the flour mixture.
- Mix thoroughly. I use my hands for this. When I get to the end, I lightly flour the counter and pour out the dough, mixing 4-5 times to make sure everything is combined.
- Put about 1 tbsp of olive oil in the bottom of a large bowl. Wipe it all around the bowl so the rising dough won't stick. Add the dough and swirl it around so it gets a very light coating of oil. Cover the bowl with a kitchen towel and put it in a warm place. See the tips below for suggestions.
- Let the dough rise until doubled in size, about 2 hours.
- If you have used the oven to help the dough rise, remove the bowl to a counter.
- At the end of the two hours, place the Dutch oven, including the cover, into the oven and heat it to 450 degrees. Once it reaches the 450 degrees, leave the pot in there for another 20 minutes.
- As soon as you put the pot into the oven, gently remove the dough from the bowl. On a lightly floured surface, carefully shape the dough into a ball shape and return it to the bowl. Cover it and let it rise in a warm spot (I put it on the top of the heating oven).
- When the pot is ready, VERY CAREFULLY remove it from the oven. Remove the dough from the bowl and, once again, gently form it into the ball shape. Drop the dough gently into the Dutch oven. USING OVEN MITTS, put the lid back on and put the pot with the dough in the oven.
- Bake for 35 minutes or until golden brown.
- Once baked, removed the bread from the Dutch oven using a spatula and let it cool on a wire rack. Again, be VERY CAREFUL of that pot. It will take a long time to cool off.
- When the bread is completely cool, you can store it in a paper bag.