Chocolate Chip Cookie Cake

Chocolate Chip Cookie Cake and a Commute
My commute is long – like 90 minutes each way. It involves a train, two separate subway lines, walking, and stairs. Lots and lots of stairs. I prefer the trains to driving, however, because it gives me lots of time to think. And what I think about a lot is creating recipes. It was during one of these trips that I came up with this wonderful idea: a chocolate chip cookie cake.
A Very Soft Chocolate Chip Cookie Cake
The recipe for this cake was further developed while proctoring a test (relax; they were finished). I started thinking about the ingredients for a regular chocolate chip cookie and made modifications. I don’t know what your chocolate chip cookie preferences are, but I prefer them on the softer, chewier side. I knew the same would be necessary for the cake. I did some research and discovered a little bit of cornstarch would help my cookie grow while maintaining softness.
Step One: Prepare Your Pan!
At first, I considered just spreading the dough on a cookie pan, but I figured that would produce a hard, giant cookie that would be too difficult to cut. A cake pan was the way to go. Make sure you prep the pan properly so that your chocolate chip cookie cake doesn’t get stuck. I sprayed it with non-stick cooking spray, added a round of parchment paper to the bottom, and sprayed that as well. The cake slipped right out.
Remember to Buy Chocolate Chips
The ingredients aren’t anything extraordinary, just remember to soften the butter before you start. Using melting butter will change the texture and I’m not sure how that will work out. I had pretty much everything on hand, but I ended up using both regular and mini chocolate chips because I only had a bit of each left.
Chocolate Chip Cookie Cake: Better with Buttercream
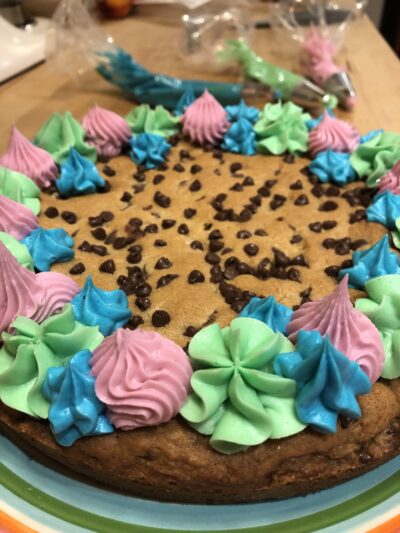
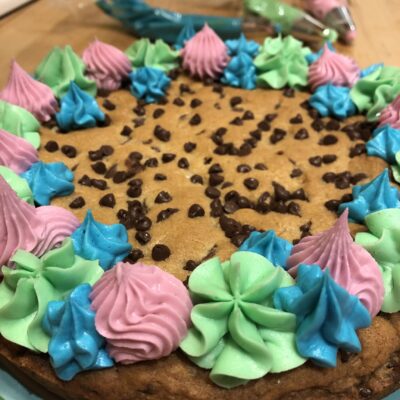
So how can you improve on something as delicious as a chocolate chip cookie cake? With buttercream frosting of course! I didn’t want to frost the cake – I mean, let’s be reasonable – but a little frosting around the edges could only make things better. I used three different piping tips and three different shades of gel food coloring.
Umm…Sorry for the No Pictures
Did I take pictures of the steps of this recipe? No; I did not. I have been trying to make videos of my bakes for some IG reels. That means I forget the pictures. Hopefully I will get myself figured out some time soon.
We All Deserve a Treat!
Go bake yourself a giant cookie cake! You deserve it.

Chocolate Chip Cookie Cake
Ingredients
- 2 cups all purpose flour
- 1 tsp baking soda
- 2 tsp corn starch
- 3/4 cup butter softened
- 3/4 cup brown sugar
- 1/4 cup granulated sugar
- 2 eggs
- 2 tsp vanilla
- 1 1/4 cups semisweet chocolate chips
Buttercream Frosting
- 1/2 cup butter softened
- 2-3 cups confectioners sugar
- 1 tsp vanilla
- 2 tbsp heavy cream
- assorted food color gels
Instructions
- Preheat the oven to 350 degrees.
- Prepare a 9-inch cake pan. Spray the pan with non-stick cooking spray. Cut a piece of parchment paper to fit the bottom of the pan. Add the paper and then lightly spray that as well.
- In a medium bowl, whisk together the flour, baking soda, and corn starch. Set aside.
- In the bowl of a mixer, add the butter, brown sugar, and granulated sugar.
- Beat the butter and sugars at low speed until creamy, about 2 minutes.
- Add the eggs one at a time, beating between additions.
- Mix in the vanilla.
- Slowly add the dry ingredients to the ingredients in the mixing bowl. You can add it in two or three additions mixing briefly to incorporate. Make sure you scrap down the sides and bottom of the bowl.
- Add in the chocolate chips and mix by hand. I was running out of chocolate chips, so I used a bit more than 1 cup normal size chips in the batter and then sprinkled about 1/4 cup mini chocolate chips onto the surface once the dough was in the pan.
- Scoop the batter into the prepared pan, smoothing the surface with a spatula. If you choose to add some chips to the top, sprinkle them over the surface and press them in lightly.
- Bake for about 30 minutes until golden. The cake will pull away from the sides and a toothpick inserted into the middle will come out clean. Start checking for doneness at about 25 minutes as all ovens are different.
- Let the cake cool in the pan on a rack for a few minutes, then flip it out onto a wire rack to cool completely.
Buttercream Frosting
- You will need piping bags and tips for this part. The cookie cake is fine without frosting, so you can skip this if you don't have the equipment.
- Cut the softened butter into chunks and add into a mixing bowl.
- Add the confectioners sugar and beat at medium speed. I started with two cups and then tested for texture and taste. I ended up using 2 1/2 cups. Always make additions slowly so you don't overdo.
- Add the vanilla and heavy cream and mix until incorporated.
- If you find the frosting to be too thin or soft, you can add a little more of the powdered sugar. Remember to add the sugar in small amounts.
- Once the frosting is ready, you can color it. I separated mine into three equal portions, placing each in a bowl.
- Add gel food coloring into each bowl. I only needed one drop of each color. Make sure you use a separate spoon to mix each one.
- The cake must be completely cool before you frost it.
- Get the piping bags and tips ready. Fill each bag with a separate color frosting and decorate.
- Store your cookie cake in an airtight container.
