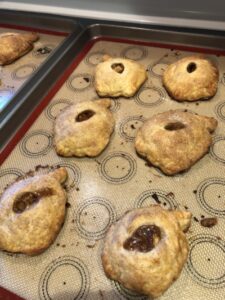
Apple Mini Pies
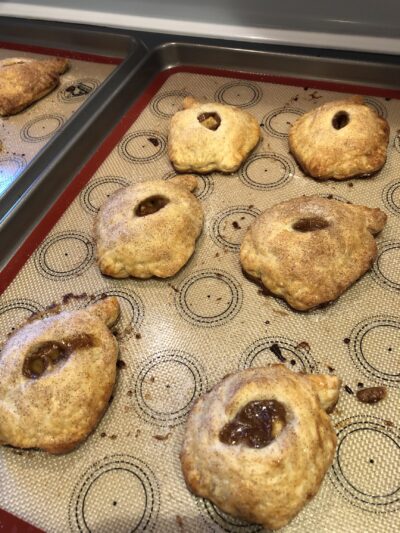
A New and More Delicious Tradition: Apple Mini Pies
It is mid November so my mind has naturally turned to Thanksgiving. Growing up, Thanksgiving was all about “tradition,” basically, eating the same foods every year. Because I was a kid in the early 70s, that generally meant a lot of frozen foods: corn niblets in “butter,” some green vegetable that I probably avoided, Pillsbury crescent rolls. Dessert was also frozen: pumpkin, coconut custard, and apple pies. It was all…fine. Because that’s what we were used to. It wasn’t until I started making my own pies that I discovered what a homemade apple pie could taste like. These mini apple pies – which can easily be converted to a whole pie – are everything I wish I had known a pie could be: buttery, flaky crust; tart apples; rich autumn spices and brown sugar.
Sometimes a Mini Pie is All You Need
These days, it is only my husband and I at home most of the time so making a whole pie isn’t always practical. These mini pies allow us to eat one at a time and store the others in the fridge. I think it would also be fine to freeze the leftovers. Fresh pie crust gets gross after a few days at room temp, so these little ones help us to cut down on waste. I mean, who wants to throw away a delicious pie?
All Butter Crust: Tender and Flaky
Start out by making the all butter pie crust. You can do this in advance and store it in the fridge. I often make the crust one day and the pie another. It is a great method for making pie when you don’t have a lot of time. All butter is my preferred crust. There is something about the idea of shortening that grosses me out.
Cold, Colder, Coldest
I think the most important step in making a really flaky crust is keeping the ingredients very cold. I take one stick of butter out of the fridge, cut it into cubes without touching it with my fingers and put it back in the fridge while I cut up the second stick. Touching the butter with warm fingers will cause it to melt a bit, whereas you want semi big pieces (pea-sized is the usual recommendation) incorporated into your dry ingredients. You also need ice water. I fill a measuring cup with cold water and ice cubes and scoop it out by the tablespoon.
Pie Crust Techniques
You can mix the butter into the flour in a variety of ways: two forks, a pastry cutter, your fingers. I think the finger method is the worst way as, again, it will melt the butter. Personally, I use a food processor and pulse it just enough to make those pea-sized pieces. After that, I add a bit of vinegar and then the ice cold water and pulse only until the dough starts to come together. Once it is less than super crumbly, I dump everything onto the counter and mix with a bench scraper, flipping the dough over and over until it sticks together. I finish by separating the dough into two pieces and wrapping each in plastic wrap. As always, cold is best! Put the prepared dough into the fridge for at least two hours.
The Most Delicious Apple Pie Filling
As I get to the end of the chilling time, I begin the filling prep. For the first forty years of my pie baking, I made the same boring filling over and over. That changed this year when I started developing my own recipes. It is a total game changer! This filling requires small cubes of apple (because we are making mini pies), brown sugar and some delicious fall spices: cinnamon, nutmeg, cloves, and allspice. I also pre-cook my filling. Just five minutes of simmering in a deep saute pan means a) less baking time and b) a house that smells absolutely amazing. Note that I let the filling cool a bit so it doesn’t melt that butter in the crust.
Shaping Your Apple Mini Pies
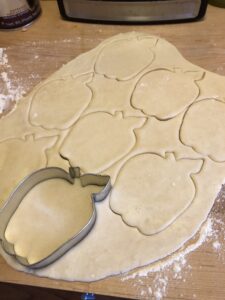
You may need the crust to sit out for a few minutes before rolling it out, depending on your arm strength. I definitely have to give it a bit of time. Once the dough is pliable, I sprinkle the counter and rolling pin with flour and get to work. For these pies, I used a large apple-shaped cookie cutter.
Making a Seal
Shape your dough and fill it with a bit of apple, leaving room around the edges. I brush the edges with an egg wash as a kind of glue and topped with a matching piece of cut out dough. I press the edges down with a fork and cut a little slit for the steam in the top.
Giving Your Dough Some Flavor. Who Knew?
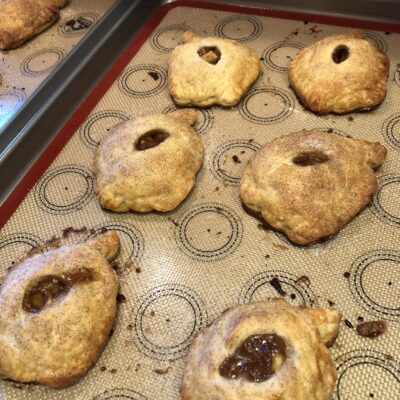
In my first attempt, my husband said the dough didn’t have enough flavor (does dough usually have flavor?), so I brushed it with egg wash and sprinkled it with cinnamon sugar. I have to say, it was pretty amazing. Bake your mini pies for about 30 minutes or until golden.
These aren’t the frozen pies of my youth – which were OK and mostly fill me with nostalgia. These are flaky and flavorful and full of new holiday memories to be made!
Apple Mini Pies
Ingredients
All Butter Pie Crust
- 2 1/2 cups all purpose flour
- 1 tsp sugar
- 1/2 tsp salt
- 1 tsp white vinegar
- 1 cup butter VERY cold
- 11 tbsp ice water
Apple Filling
- 3 Granny Smith apples
- 1/2 cup brown sugar
- 1 tbsp flour
- 1 tsp cinnamon
- 1/2 tsp nutmeg
- 1/4 tsp cloves
- 1/4 tsp allspice
- 2 tbsp butter
Cinnamon Sugar Topping
- 1/3 cup granulated sugar
- 1 1/2 tsp cinnamon
Egg Wash
- 1 large egg
- 1 tbsp water
Instructions
- Prepare the crust. It will required 2 hours of chilling time.
- Mix together the flour, salt, and sugar in a bowl or in the bowl of a food processor.
- Cube the butter. I do this one stick at a time so that the other one can stay in the fridge. Once one is cut, put it back in the fridge while you do the other.
- Cut the butter into the flour mix. You can do this by pulsing with the food processor or by using two forks or a pastry cutter. Cut in the butter until you have pea sized chunks.
- Add the water and vinegar. Pulse until the dough starts to come together.
- Turn the dough out onto a lightly floured surface.
- Mix the dough together until you it sticks. I use a bench scraper to avoid touching it with my hands and messing with the butter.
- Cut the dough into two equal pieces and wrap in plastic wrap.
- Put the dough in the fridge and let chill for at least two hours.
Apple Filling
- Peel and core the apples.
- Chop the apple into quarter inch pieces.
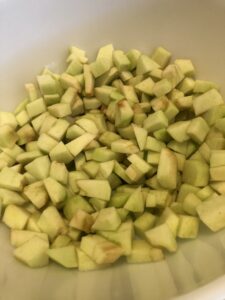
- Put the apples into a mixing bowl and add the brown sugar, flour, and spices. Stir.
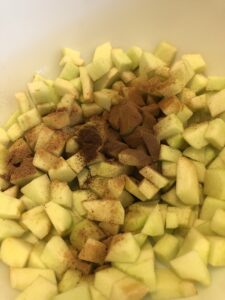
- Melt the 2 tablespoons of butter in a deep sauté pan over medium heat.
- Add the apples and cook over medium high heat for about five minutes. You don't want to overcook the apples and make them mushy.
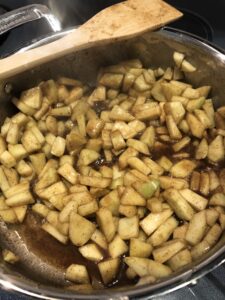
- Set the apples aside.
- While the apple cool a bit, take the dough out of the fridge. You may need to let it sit a few minutes until it can be rolled out.
- Preheat the oven to 350 degrees.
- Line two baking sheets with parchment paper.
- Lightly flour the counter and a rolling pin.
- Roll out the dough, one disc at a time, to about 1/8 to 1/4 inch thickness.
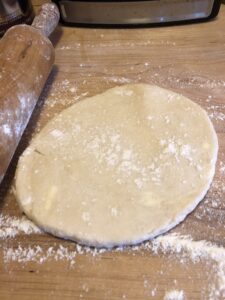
- Cut the dough with a large cookie cutter – a circle or apple shape work well. You can also trace around the top of a large glass or mug.
- If your dough gets too gummy from handling, put it back in the fridge for a few minutes.
- Beat an egg in a cup and add one tablespoon of water.
- Mix up the sugar and the cinnamon in a large bowl.
Assemble the Pies
- Place one cut out on the prepared baking tray.
- Fill with some of the filling (I used about 1 tablespoon), leaving about 1/4 free all around the edges.
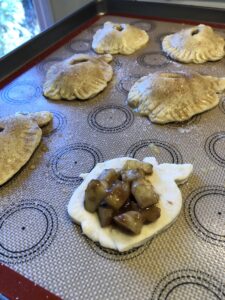
- Brush egg wash on the edges.
- Place the top on the pie and press down with a fork.
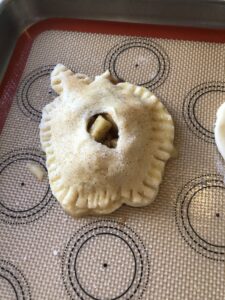
- Using a sharp knife, cut a slit in the top.
- Brush the top with egg wash.
- Sprinkle with the cinnamon sugar.
- Repeat until you use all of the dough. You may have some filling leftover.
- Bake until golden, about 30 minutes.
